A crash course in common cooking techniques -- everything you need to survive in the kitchen.
I want to be perfectly clear here. I am not the supreme authority on cooking terms. There are literally hundreds of sources where you can find similar definitions of the same techniques we all use. These are simply my definitions, the way I do things, and the way you should interpret those definitions while preparing my recipes.
The Spruce Eats is one of my favorite professional food blogs. Every recipe works (and that's not always the case,) their cooking terms are on point and I trust their knowledge base.
There’s something else I want to share before you read this list. My approach to everything on this site will be done in the same manner I teach the cooks who work for me. Most people (including those who cook for a living) aren’t that interested in
why things work, it's all about what works and what doesn’t. But I care why. So, at times, whether you like it or not, I won’t be able to stop myself from passing on some of my hard earned knowledge. After all, I assume that's why you're here!
I promise I’ll try to keep it simple and on point. Well, most of the time anyway.
My initial brief descriptions were compiled from several sources - many were similar, though some were WAY out there. It’s no wonder people have a tough time finding what works and what doesn’t online.
All temperatures are Fahrenheit.
Baking
Cook (food) by dry heat without direct exposure to a flame, typically in an oven or on a hot surface.

I agree with this definition. At least as a basic, direct statement.
In all of my recipes, when I tell you to bake (whatever) at 350 degrees, I
always mean uncovered in a pre-heated oven. No exceptions to this rule. Baking is baking. Dry heat. Indirect. If I want you to cover something in the oven, or add any type of liquid to the pan, or to the oven, I will be very specific on where, how much, and when to add the liquid.
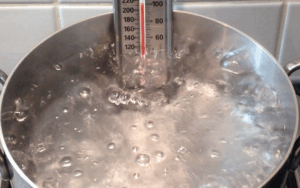
Boiling
The action of bringing liquid (water) to the temperature at which it bubbles and turns to vapor.
(Blanching, poaching, simmering, and steaming are all subcategories of boiling. But not all pertain exclusively to water.)
Three major items come to mind when I think of boiling. Potatoes, pasta, and eggs, and I want to discuss all three.
At sea level, water boils at 212°. Whatever product placed into boiling water will cook rapidly. I don’t want to get too technical here, but one thing I need to explain is that water is one of the best conductors of heat there is. Placing any food item directly into boiling water will cook it faster than most other methods at higher temperatures. And that’s at 212°. Kinda cool, huh?
With potatoes, you have a few choices to make. Do I peel them or leave the skin on. Do I cut them first or cook them whole. That pretty much sums that up.
If I’m making a gigantic batch of potato salad, then I prefer to cook them with the skin on. It’s so much faster to peel a potato
after it’s been boiled than before. For mashed, or smashed, or parboiled, or whatever the heck you’re doing with your potatoes, it’s best to peel them first. Especially if you want a uniform shape like ¼” cubes for chowder.
The other thing to take into consideration when boiling peeled potatoes is the end result. If you’re going to do the work, to take the time to peel and cut up those potatoes before you cook them, I assume you want them to look the same after they’re cooked. If that’s the case, you need to turn the water down to a fast simmer, around 190° and add a 1-2 tablespoons of white vinegar per quart of water. The vinegar with help the potatoes hold their shape.
If you think about the fact that most traditional cooking methods cook food from the outside in, this makes sense. If you allow the water to continue in rapid-boil then the outside of your cubes will be obliterated before the insides are soft.
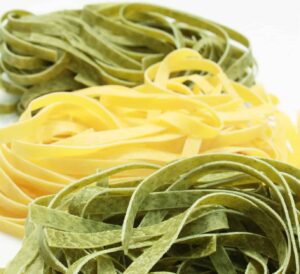
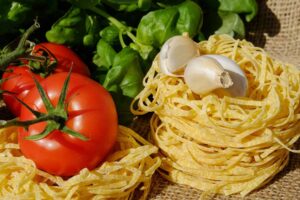
Pasta. Hmm, everybody loves pasta, even vegans. Unless of course, they’ve gone gluten-free. Then, the challenge begins!
Cooking pasta: Always, and I do mean always, salt the water before adding the pasta. Once the pasta is cooked it won’t matter how much salt you put on it, or in the sauce for it, the pasta will always be bland.
One of the myths out there is that adding salt to water increases the temperature above 212°. Kinda true, but not really. Scientifically speaking, yes it does. But on such a minute scale that a regular thermometer won’t even pick up the difference. So, with that little tidbit out of the way I want to say this. Your water needs to be at a rapid-boil before you add your pasta. Doesn’t matter if it’s fresh, dried, freshly dried nests, or frozen pasta, the same rule applies.
Now, here’s where these four forms of pasta differ. Fresh pasta will be very soft and stick together fairly quickly. It needs to be stirred immediately after adding it to the pot. Dried pasta, depending on the thickness of the cut determines when to begin stirring. The thinner the pasta (capellini, angel hair, etc.) I usually wait about 10 seconds, then stir the pasta. On thicker cuts like fettucini, the best method is to make sure you separate the pasta as you add it to the boiling water. I will hold up to a pound in my hand above the pot and let the individual noodles slip from my fingers. Also, thicker pasta needs to be stirred immediately. If not, they’ll stick together. And once they’re stuck, you’re screwed!
For freshly dried pasta nests (and there are quite a few) like Capellini, tagliatelle, or fettuccine, you need to wait until the water returns to a boil before you stir for the first time. If not, your pasta will break into a thousand little pieces. Unless you’re making soup, not good.
With frozen string pasta the same rule as nested pasta applies. Let the water come back to a boil, (and wait a little longer) before you attempt to separate the individual noodles.
What you’re really doing is allowing the pasta to thaw before stirring. Each method takes a little practice to see the difference.
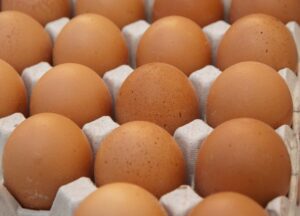
Now, to eggs. Here again, adding salt to the water before adding the eggs makes all the difference in the world. But, salting the water has nothing to do with taste. It’s all about getting the shell off once they’re done. Eggshells are porous. They’re made up of mostly calcium. They breathe. Boiling eggs in salted water separates the inner membrane that protects the egg white from the outer shell. Once the eggs are boiled and cooled, the shells will slip off easily. I add approximately ½ cup of kosher salt to every gallon of water before adding the eggs.
Now for the disclaimer: Most sources will tell you that salting the water doesn’t affect the flavor of the egg. It is done mainly to congeal the egg whites faster. Meaning, if you have a leaky egg in your pot, the salt stops the bleeding. Now, as I said in the forward, “These are simply my definitions, the way I do things.” In my 40 plus years of boiling eggs, I learned the hard way, if I don’t put a large amount of salt into the water before I boil the eggs, then I want to throw them against the wall when the shells won’t come off. Sorry, but I had to say that.
Using heavily salted water to make peeling eggs easier is a hard one to swallow for scientifically minded people - and I get that. But, the reason I believe in it so strongly is simple. Trial and error. In my opinion, that’s about as scientific as it gets. Salted water works. Period.
For the best hard boiled eggs, combine the salt with warm water. Just hot enough to dissolve the salt but not too hot to instantly crack the cold eggs when added to the water. Add the eggs to the warm water and bring to a boil. Reduce the heat to a sub-simmer (about 180°) and allow to cook for 3-4 minutes. Remove from heat and cover the pan. Let stand for an additional 8-10 minutes, depending on the size of the eggs.
Are there fifty other things you could boil? Of course, there are. But why? In my opinion, most vegetables should be either blanched (submerged quickly into boiling water) or steamed. Both methods are similar to boiling because they are cooked using water. To blanch, you submerge quickly. To steam, you cook above the water using the vapor created by the rapidly heated water. And then there’s poaching. For me, that’s mainly about fish. It’s also one of those methods I’ll explain in more detail in each individual recipe.
Braising
Fry (food) lightly and then stew it slowly in a closed container. Again, I agree in general. But, not completely.

Braising is very simply the act of slow cooking a piece of meat in liquid. Yes, you do need to sear the meat before adding the liquid. Also, it can be cooked covered or uncovered. And trust me, it makes a huge difference which choice you make.
The difference between simply baking a piece of meat and braising it is temperature. And more to the point, how the liquid’s temperature affects the meat.
Water boils at 212°, so, when you cook something (short ribs) in liquid, in the oven, regardless of how high the oven is set, the water can only reach 212°. But, and this matters, if the pan holding the meat and liquid is covered, the water will continue to boil. And it will boil rapidly. Unless of course, you set the oven below 212°.
This is where covered or uncovered comes into play. When you Braise a piece of meat, moisture is extracted from the meat. If it boils too rapidly then too much moisture is removed, leaving you with a drier piece of meat. And who wants to go through all the trouble of slowly cooking something just to eat it dry. Not me. So, the bottom line is, leave a corner uncovered, or the lid slightly ajar. You’ll be much happier with the end result.
I don’t want to get into all the technical mumbo-jumbo (well, any more than I already have) but I will add a
link or
two about how the braising liquid breaks down the collagen in the meat and turns it into gelatin. This is what holds the meat together and makes it so tender.
Broiling
Cooking by exposing food to direct radiant heat. In this case under the broiler in your oven.

Did you ever wonder why your oven came with a broiler pan? Have you ever used it for anything other than an extra cookie sheet or to roast a piece of meat in? Well, that’s not what it’s for.
When something is broiled, the method is very similar to grilling. The major difference is that the food item isn’t placed above the heat source on a preheated grill grate, it’s placed below.
Now, with that said, when you broil a piece of meat or fish, you still need to place the food directly onto the oven grate to broil correctly. Or, you can use both pieces of the broiler pan. Personally, I don’t like this. Mainly because the slotted top section of a two-piece broiler pan set is too thick. I can never seem to get the results I want using the slotted insert. If you don’t choose either of these methods, then you’re just baking below the heat source instead of above it.
Still confused? Okay. Let me make that clearer. In order for something to be considered “Broiled,” it must have sear marks on one side. Like a grill. The broiler pan is meant to be placed below the heating element, or, on the rack below the broiling food that is cooking directly on the oven rack. (And yes, the broiler pan and the oven need to be preheated.) If you’re cooking directly on the oven rack, placing the broiler pan on the rack below will catch the juices dripping from your meat, fish, or vegetables. How closely you place the food to the heat source will depend on how thick it is, how charred you want it to be, and the preferred doneness.
Now, do you get it? I hope so because that’s all I’ve got.
(I watched about a dozen videos on how to broil a steak but couldn’t find one that matched my method. It’s not that there aren’t other ways to broil, it’s just that they won’t get you the desired result. So, until I create my own youtube video on broiling, you’ll have to make do with the written instructions. Sorry about that.)
Deep-frying
A cooking method in which food is submerged in hot fat, most commonly oil.
Most home cooks don’t own a deep-fryer. And they shouldn’t. The small tabletop models are extremely dangerous. And they suck at frying anything but the smallest amounts of food. If you only have yourself to cook for, or maybe just one child you want to make French fries for, then, by all means, buy a home deep-fryer. But, and I’ll say it again, they scare the hell out of me. I could take up ten pages alone, telling you horror story after horror story, about all the accidents I’ve either seen or been a part of involving deep-fryers.
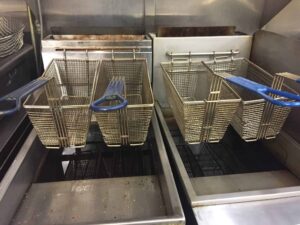
And I’m talking about commercial floor models. Operated by people who were trained, people who knew how to use them - including myself. But, I chose to add the technique to my list, so I’ll explain it anyway, despite my fears for you.
The standard temperature for deep frying almost everything is 350°. This temp is perfect for french fries, chicken fingers, chicken cutlets, wontons, empanadas, etc. But, there are a lot of exceptions to this rule. Some things, like frying whole pieces of raw chicken, are best cooked at 325°. Unless you want the outside nice and crispy and the inside raw. No? Didn’t think so. Another common exception is
fresh French fries. There are two distinct methods of making home-made fries. Three really, if you wanna count the one that turns out greasy, soggy fries. First, you can par-boil (blanch) the cut up potatoes in water, drain them and let them dry, (I should say, “Make sure they’re dry so they don’t pop all over you”) and then deep fry at the usual 350°.
The second method and best way are to first fry the potatoes in 300° oil, (again, blanching, only this time in oil) then let them stand for a couple of minutes, and then fry again at 350°. This is the way it’s commercially done.
If you’ve ever purchased frozen french fries and cooked them at home, you should have noticed that the fries seemed greasy coming straight out of the bag. That’s because they were. They’ve already been pre-fried before being frozen. It’s the standard method of blanching fresh potatoes used by commercial french fry manufacturers.
Now, the third and worst method is to fry the potato until thoroughly cooked without first blanching. I’m not going to be too much of a smart-ass here, but I know at least half the people reading this have done exactly that. And, I’ll also bet that they didn’t understand why their fries came out so soggy. Now you know.
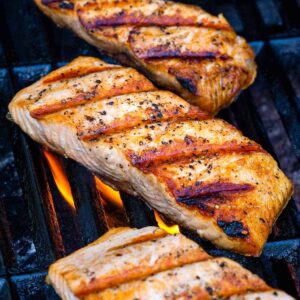
Grilling
A form of cooking using dry heat, usually with charcoal or gas with the heat source below the food.
In the restaurant, I use a heavy-duty, radiant, natural gas, char-broiler. Basically a gas grill, with indirect heat (meaning it has a flame deflectors over the actual burners) with quality cast iron grates. At home, most people have a gas or charcoal grill. Something purchased from one of those big-box home stores. Notice how I didn’t mention any story by name. I’ll wait until I get paid before I do that.
Grilling is one of those things entire books are written on. To be honest, I have a few. But, in order to keep this list simple and straightforward, I’ll be brief.
Using a New York strip steak as our example, this is the procedure I like to follow.
First, season or marinate the meat. There are literally thousands of different ways to do this. If you look through my recipes with the tag “Grilled” you’ll find several.
Second, preheat the grill. You will want one section set to medium-low, and the other set on high.
Next, spray or oil the entire grill. Allow the oil to burn off for a minute or two to season the grates. This is something I do EVERY time before placing anything on the grill. Wipe off any excess spray or oil left after the burn-off.
Place the steaks on the low side of the grill. Cook over the lower flame until the steaks are one step down from the temp you want. Transfer to the hot side and finish your steaks.
Now, let me explain why I suggest this method of cooking a steak. By cooking your steaks at a lower temperature until they’re almost done will give you a more even temp throughout. In other words, your steak won’t be fried to a crackly crunch on the outside and raw on the inside.
Unless of course, that’s the way you like it. Then please, char away.
When I tell people why I cook a steak this way, they usually shake their head and look at me like I’m crazy. Think about it this way. Why do some of the best, upscale restaurants in the country pre-cook their steaks sous vide (vacuum sealed) in simmering water? Why would they do something so against tradition? It’s because of the way water conducts heat. It will bring a steak close to the desired temp without the meat ever touching the water, all without extracting one ounce of moisture from the meat. You can fake this process by starting off on the lower side of your grill. Try this one time, and you’ll be a fan of mine for life. That’s a promise.
Roasting
The act of cooking something (food) in an oven or over an open flame.
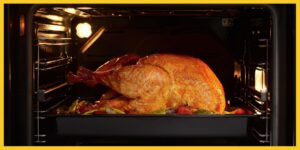
I could have combined this term with baking, as in baking and roasting, but, and this is just for me, I like to separate the two terms. Baking is for desserts, cakes, cookies, pizza, bread, whatever. As long as we’re not talking about a big, fat, piece of meat.
Roasting is what you do to meat, and usually at a higher temp than you bake at. Yes, you can roast fish, but who would. You could also roast vegetables. And I do. But, being the carnivore that I am, I prefer to roast my vegis alongside a nice pork roast, or prime rib. If you’re not a meat eater then I understand roasting only vegetables. And again, I do that sometimes. But, given the choice, I prefer to cook whatever vegetables I’m gonna serve in the same pan as the meat.
Now, with all that out of the way, let me say this. Depending on what cut of meat you’re cooking, and what temperature you want the end result to be, the time and oven settings will vary considerably. I’m not going to go into detail here, but I will say that each recipe I post that calls for “Roasting,” will have very explicit instructions on oven temp, time, whether to baste or not and so on.
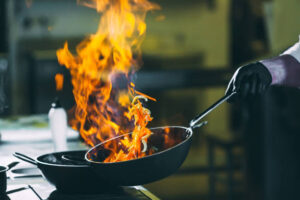
Sauteing
To cook in a small amount of fat over fairly high heat. That’s my definition.
Most of the sources I found for “Sauteing” were similar. Mine sums them up.
The term “Sauteing” literally means “Jumping” in French. Like jumping out of the pan. Which is exactly what happens when the moisture from a protein hits the hot oil in a saute pan. Be careful!
In the restaurant, one of the biggest struggles I have with my cooks is stopping them from cooking things “Too hot.” To saute, the pan must be relatively hot, but not smoking hot. I prefer to heat up the pan empty, then, add a touch of whatever I’m using to cook in, (i.e. olive oil, vegetable oil, ghee, etc.) then, let the oil heat for 5 seconds before adding the protein.
There are several ways to coat the food before adding it to the pan. You can dust it with flour, leave it plain and “Sear” it, or you can coat it with flour, egg, and bread-crumbs which are called breading. But this method would fall more into the pan-frying category.
Which is good, it just isn’t sauteing.
In a commercial kitchen, the term “Saute” is used to describe an action station. In most of my kitchens (which are usually pretty small), there are three action stations (saute, bake/grill, and salad/dessert) and an expediter. Usually me. The saute station is responsible for all menu items cooked in a saute pan, hence the term “Saute Station.” In this respect, we’re not talking about how the food is actually cooked, but the pan the food is cooked in. On the “Saute Station,” some items are seared dry in a hot pan, while others are cooked very slowly. Some dishes are started in a hot pan and then finished in the oven. So, what I’m saying is that sometimes the term “Saute” simply refers to the type of pan you’re cooking in.
Just like everything else on this site, when I post a recipe that says to “Saute,” I will be specific on how hot, how long, and what to cook in. I hope that covers it.
Stewing
To cook by simmering or slow boiling. Or, a state of agitation, uneasiness, or worry. I had to add that.
If you’ve ever worked for me, then you would have seen both definitions in action simultaneously. Sad, but true.
Stewing is very similar to braising. Some proteins are best seared before adding liquid, and others are better placed directly into whatever liquid you’re using. I prefer
chicken stock to water everytime. To be completely honest, I normally sear everything. Unless I’m cooking flank steak for Ropa Vieja. The meat for ropa needs to be pulled — left stringy. Not held together.
As far as I’m concerned the two terms “Stewing and Braising” are almost identical. The only difference is that one is done on the stove-top and the other in the oven. It’s really up to the individual cook’s preference. I prefer the oven. Mainly because there’s less chance of me burning something and having to start over again.
Bottom line. It’s safer.
Most of my experience comes from working in commercial kitchens. Every cook must learn to multitask or else find another line of work. Sorry, but that’s just the way it is. It’s not personal.
This list is by no means a complete list of cooking techniques. But, by using any of these choices, you can cook almost anything. My intent here is to give the reader a basic understanding of how things are “Usually” cooked in a commercial kitchen. There are numerous other ways to cook food and thousands of variations on each method. Some of those I will discuss further in individual recipes. But, for the most part, these are my favorite ways to prepare anything, and everything.
I hope my list helps.
Chef Felix